[Training and Results] Deep Convolutional Generative Adversarial Networks on CelebA Dataset using PyTorch C++ API
Contents
It’s been around 5 months since I released my last blog on DCGAN Review and Implementation using PyTorch C++ API and I’ve missed writing blogs badly! Straight the to the point, I’m back!
But before we start, the PyTorch C++ Frontend has gone through several changes and thanks to the awesome contributors around the world, it resembles the Python API more than it ever did! Since a lot of things have changed, I have also updated my previous blogs (tested on 1.4 Stable build).
What has changed?
There have been major changes in the PyTorch C++ Frontend API (Libtorch) and we’ll be discussing some of them which were related to our implementation on DCGAN. Let’s see, what parts of our code have changed in the recent Libtorch version. Well, the frontend API of PyTorch in C++ resembles closely to Python now:
For what concerns our code on DCGAN, quoting the author (Will Feng) of PR #28917.
In Conv{1,2,3}dOptions: - with_bias is renamed to bias. - input_channels is renamed to in_channels. - output_channels is renamed to out_channels. - The value of transposed doesn’t affect the behavior of Conv{1,2,3}d layers anymore. Users should migrate their code to use ConvTranspose{1,2,3}d layers instead.
So, starting first, we need to change with_bias to bias in our model definitions. The generator class in DCGAN uses Transposed Convolutions, and that’s why we need to migrate from torch::nn::Conv2dOptions class to torch::nn::ConvTranspose2dOptions (this is because using .transposed(true/false) does not work anymore on torch::nn::Conv2dOptions).
That is all for the changes we needed to make. To make it easy to track changes and use the code I wrote, I’ve made the project public on GitHub. Feel free to file an issue in case you hit a bug/error.
Time to talk about results!
Results
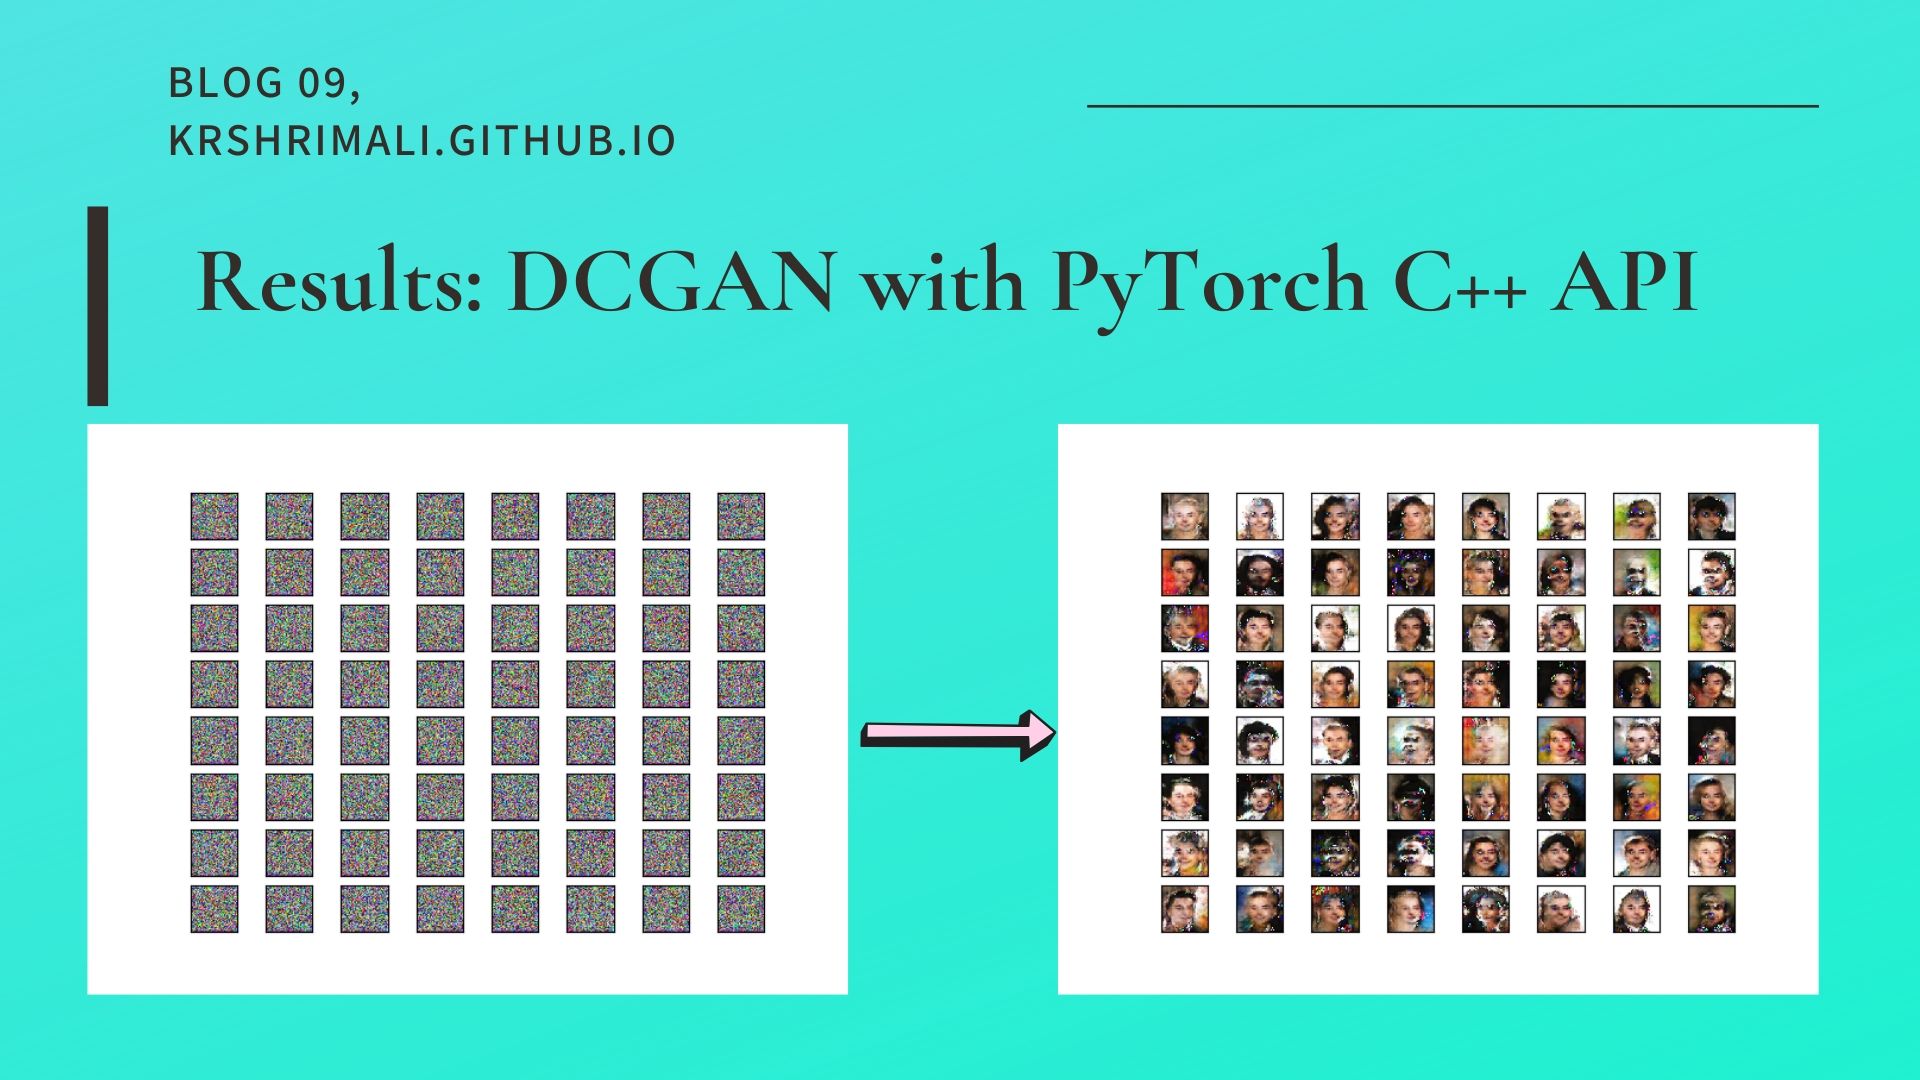
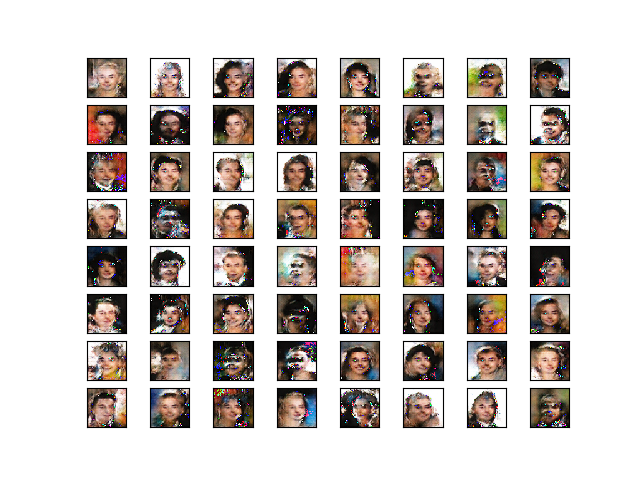
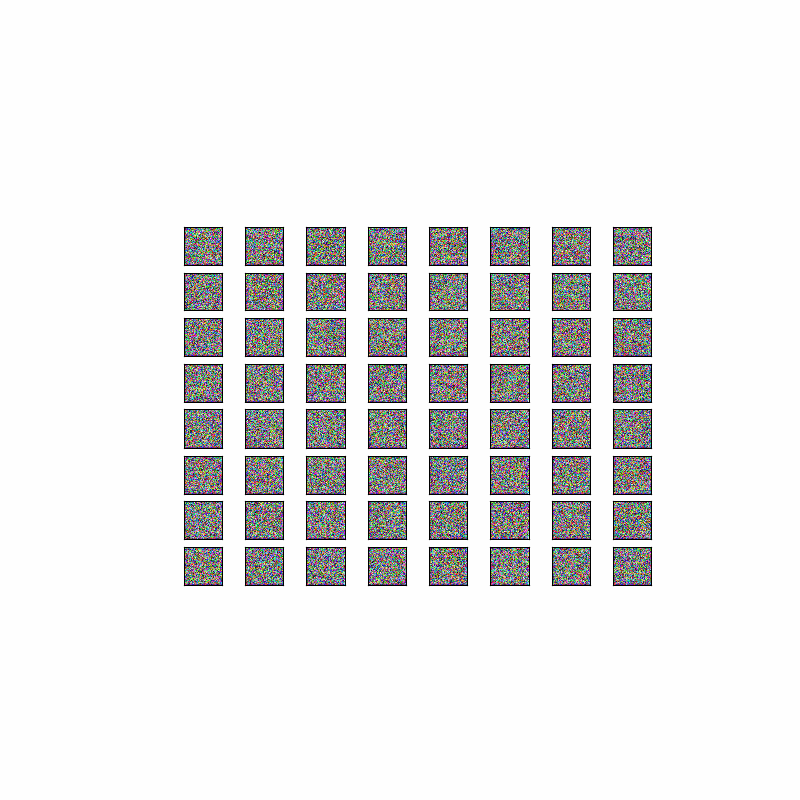
The aim of this blog is to get DCGAN running on our celebA dataset using PyTorch C++ Frontend API. I’m in no way aiming to produce the best possible results. I trained the DCGAN network on celebA dataset for 10 epochs. In order to visualize results, for every checkpoint (where we save our models), we pass a sample noise image (64 images here) to the generator and save the output:
// equivalent to using torch.no_grad() in Python
auto options = torch::TensorOptions().device(device).requires_grad(false);

// netG is our sequential generator network
// args.nz = 100 in my case
torch::Tensor samples = netG->forward(torch::randn({64, args.nz, 1, 1}, options));
// save the output
torch::save(samples, torch::str("dcgan-sample-", ++checkpoint_counter, ".pt"));
Once we have the saved output, we can load the file and produce output (find the display_samples.py file in the GitHub repo for this blog). Here is how the output looks like, after 10 epochs of training:
And how about an animation?
Isn’t this amazing?
That’s it for this blog. See you around! :)